 |
| Handbag and Gloves in 1:12 Scale |
You will need:
- microsuede
- beads to look like buttons
- fine chain
- little findings to make bag clasps
- ruler
- nail scissors
- fabric glue
- toothpick
To make the gloves:
- Cut 2 pieces of material about 1 inch long and half an inch wide. You don't have to be too exact as gloves can be of different lengths.
- Fold each piece in half longways and glue. Let dry.
- Using the nail scissors, very carefully make 3 cuts at one end - this will give you 4 fingers. Try to keep each 'finger' the same width and look at your own hand to see the lengths of the different fingers. Make sure you have a left hand glove & a right hand one! Round the ends off.
- Make the thumbs separately with a tiny piece of the material. Glue one underneath each glove so it sticks out the sides.
- Decorate by glueing tiny beads for buttons at the 'wrist' if you wish.
 |
| Showing where to Attach the Thumbs for the Gloves |
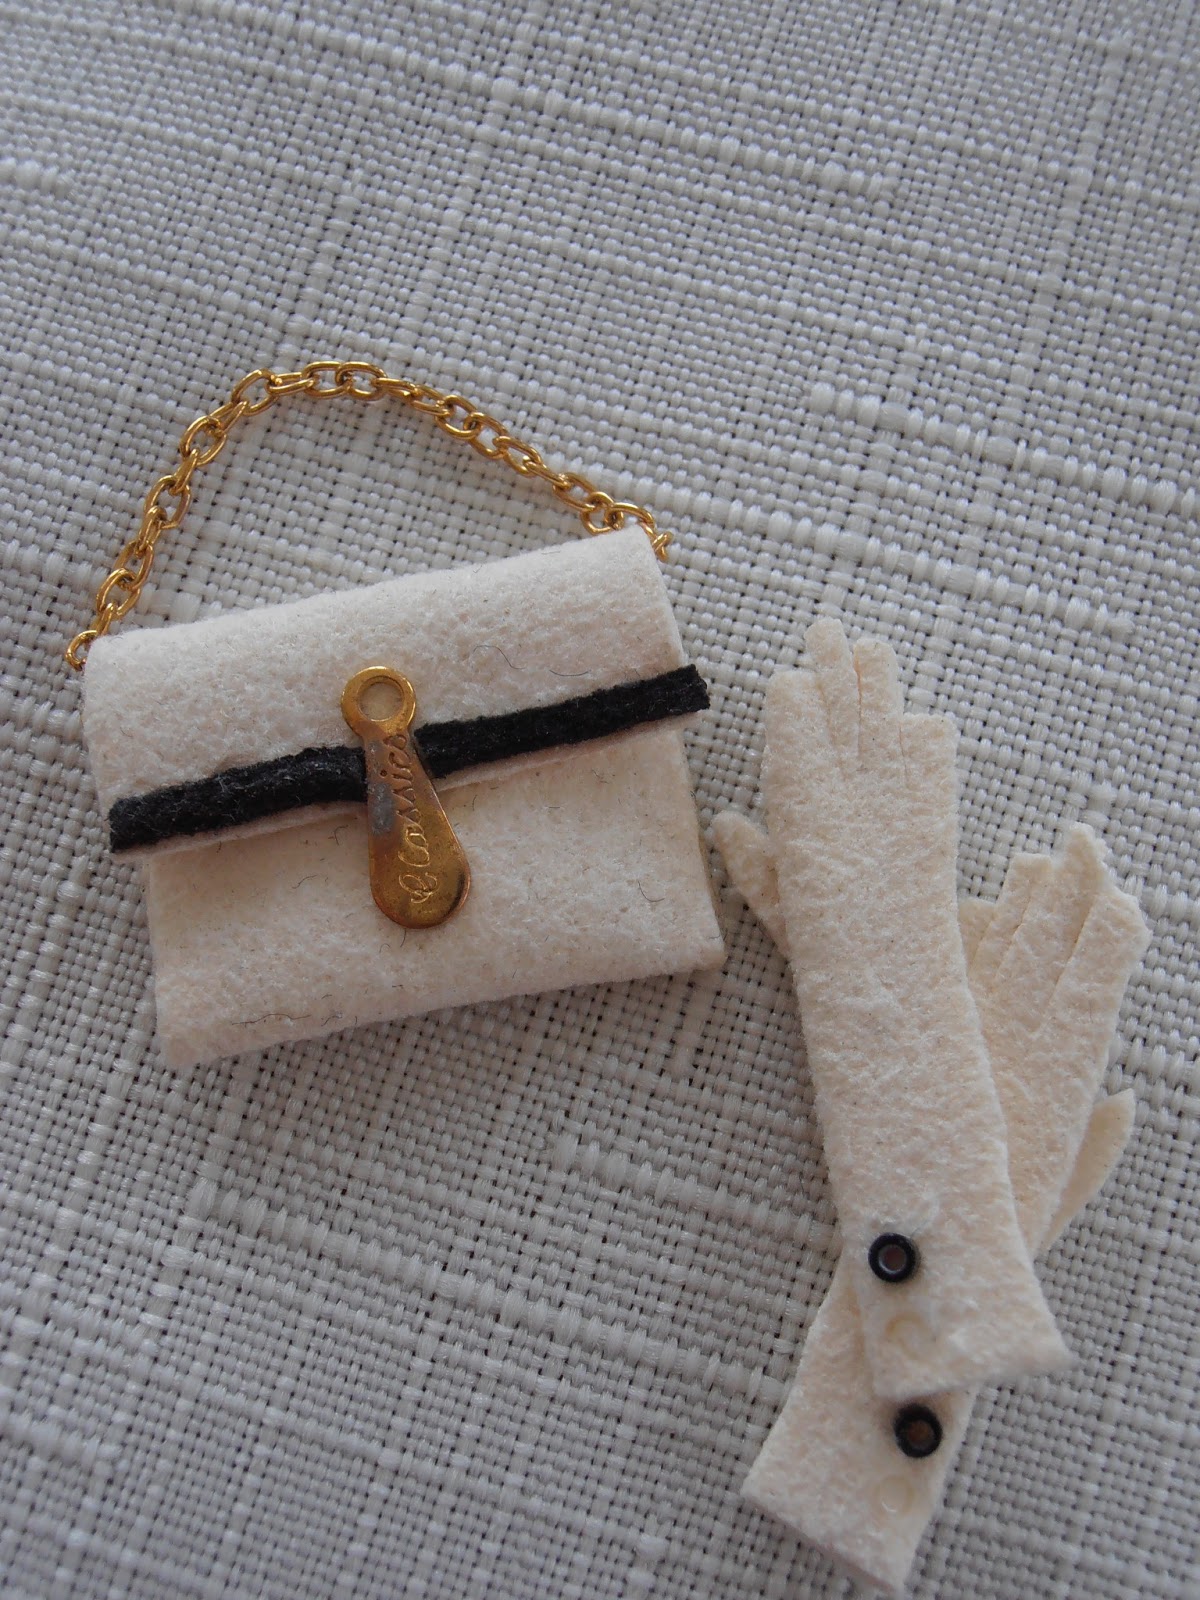
To make the handbag:
- Cut a piece of material one inch wide and 1 1/2 inches long.
- Fold the top third over to make a flap. If you want to make a handle, cut a length of fine chain and lay it under the fold so it will be secured when you glue the flap down.
- Use a toothpick to spread the glue in a fine line up each side of the bag and across the underside of the flap to glue it down.
- Decorate the bag with little bits of jewellery findings to make clasps and/or a strip of contrasting material.
As always it seems to take me longer to write the instructions than it does to make things! The gloves and bags do look lovely displayed on a bed or in a haberdashery shop, or stashed in your dolls house dressing table drawers.
Thanks for this cute tutorial, Wendy! I will most certainly give it a try!
ReplyDeleteHope they turn out well for you, Lucille!
Deletemust try this ,thanks
ReplyDelete