Wednesday 28 March 2012

Miniature Museum: In the Bookcase

My Museum in Miniature
Previously I have shown you the layout of my miniature museum room by room. This photo gives you an overview of what it looks like in real life, set up in the teak bookcase in our home.
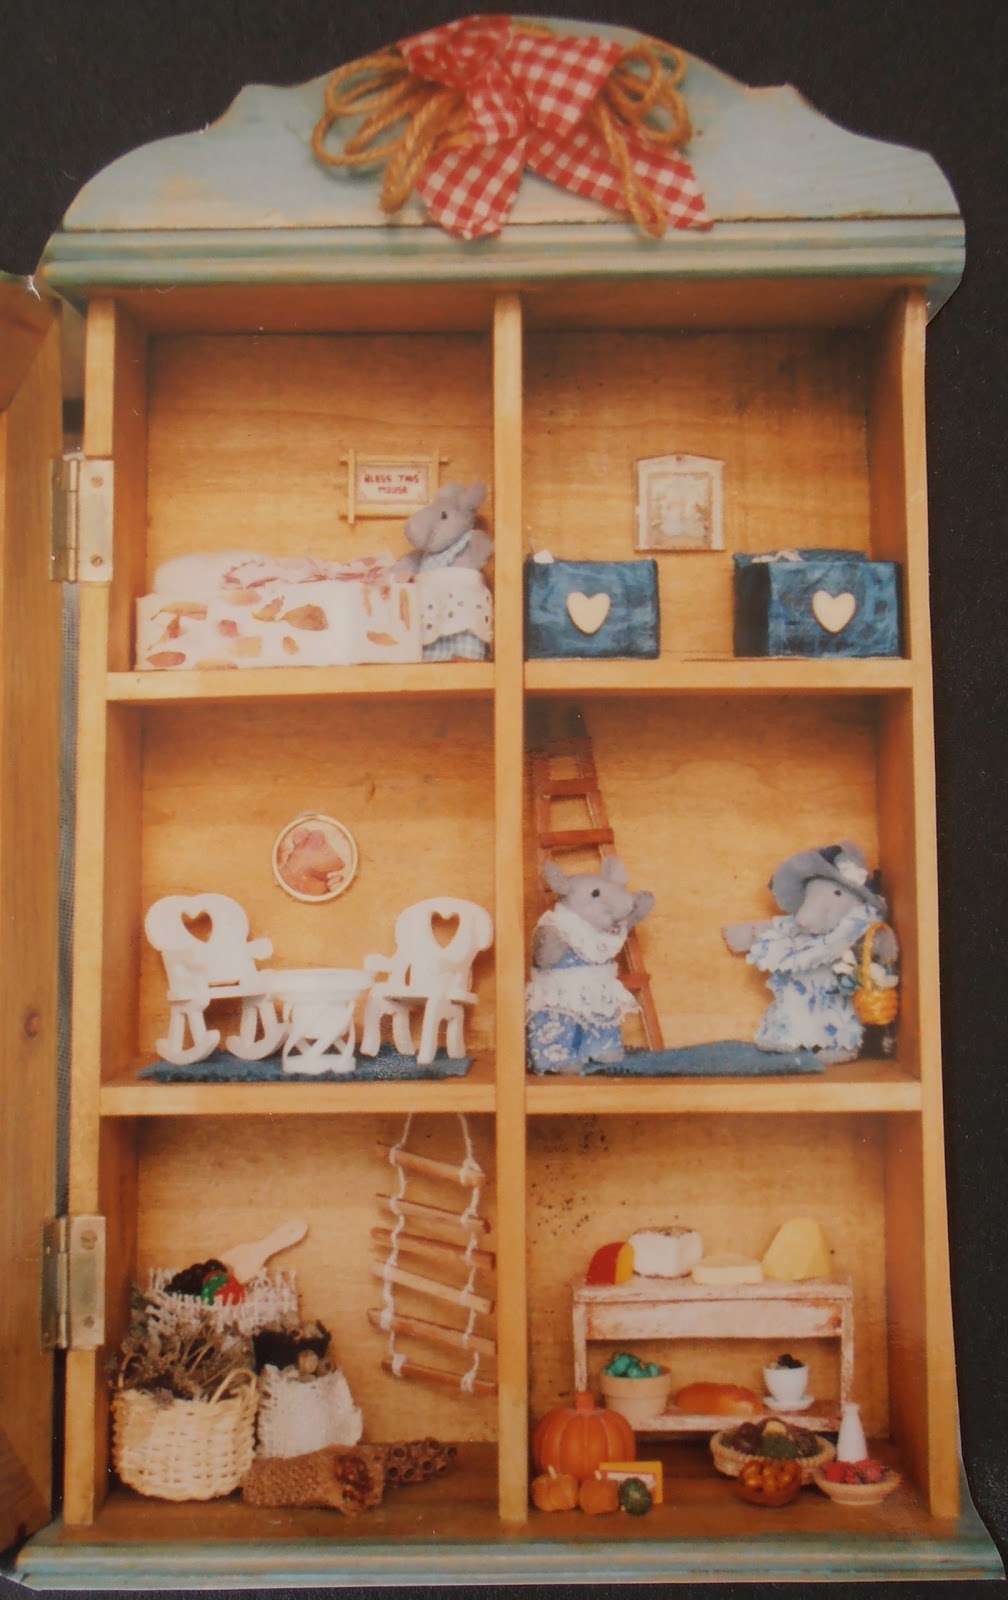
   This was such an easy way of making the museum. The bookcase was already divided into the 'boxes', it had a back wall, and the shelves were adjustable so I could select the height I wanted for the rooms (galleries).
   The hardest part was finding a home for all the books and photo albums that were displaced in favour of my mini treasures! Some ended up in the antique Chinese chest we use as a coffee table; others were lugged out by the armful to the studio and into a big cupboard I have out there.
   One of these days I may change one of the museum galleries. I have in mind a display with a 'childhood toys' theme. In fact I've made a start. I painted a miniature rocking horse and ripped off its fake hair. Last Sunday, at our grand-daughter's show jumping competition, I cut some real horse hair from Rebecca's horse, Digger's tail! That will be perfect for the mini horse's mane and tail. Thanks, Rebecca, and Digger!

Monday 19 March 2012

Retro Caravan: the Mini Bits and Pieces

Accessories I've made for the caravan
Now I'm onto the part of a miniatures project that I like the best - getting all the little accessories bought and made. I've had fun thinking about all the things you'd have in a caravan during the summer holidays in the 1960s - the beach towels and sunhats, the fishing rod, the bread and jam and fruit for lunch, the magazines and books, the swimsuit and board games.
Accessories I've bought for the retro caravan
  I made a mat for the caravan doorway and the plan is to make sandy footprints on it. After all, you can't have a beach holiday without sand getting into everything, can you!

Thursday 15 March 2012

The Miniature Mouse House

The Miniature Mouse House


It was all my husband's idea. He came home from a visit to a secondhand shop with this little wire fronted cabinet. 'The perfect mouse house for the little mice you've been making,' he said.
Details of the Mouse House
  This was a really fun project to do. I covered the little beds (cut from individual portion cereal boxes) with handmade papers that had rose petals and string in them. The little embroidered motto says 'Bless This Mouse'. A couple of sessions with the polymer clay and all the food was made. The rope ladder is matchsticks tied with crochet cotton, the grandfather clock is a die cut pencil sharpener and the circular table with the teapot on it is the lid of a Berroca tablet container.
   All up, this project, including the cabinet, cost under $12. Low in cost, high in enjoyment!

Monday 12 March 2012

An N Scale Scene in 'Book Case'

Use real books to frame an N scale scene
Today I'd like to showcase my friend Pamela's N scale scene. It is unusual in that she created it within a frame of real books. Such a cool idea!
   She bought several old hardcover Reader's Digest books very cheaply. Firstly she very carefully cut away all of the pages so the spine and covers were left intact. Blocks of wood were inserted in between the covers with the facing edges covered in fabric. Pamela glued together the number of books she would need to frame her scene.
A closeup view of Pamela's N scale scene
   She then created a wooden box to make the scene in.  The scenic backdrop is made of photographs pasted on to the back and sides. This box slides in to the space left between the books.
  Of course the fun part is collecting the bits and pieces, making things, planning what will go where, and setting it all out.
   What I really like about this work of Pamela's is that from one side it looks like a lineup of real books on a shelf. Turn it round and there is the secret surprise - the N scale scene!

Thursday 8 March 2012

Mice in Miniature

Miniature mice made from felt
I am very fond of these cute little critters. On a photocopier I scaled down a toy mouse pattern to make these miniature mice. They are 2 1/2 inches tall. I used a fine grade of soft felt so they are quite flexible. It certainly helped when I had to turn them inside-out. That was the only tricky bit in making them! Each mini mouse took about an hour to stitch.
   I also made a mouse house for them with all sorts of tiny accessories to illustrate a book at a school's Book Week display. 
   Because of their size, the miniature mice are just right for little children to hold. When kids visit our home, they love to play with them.

Sunday 4 March 2012

Making Dolls' House Interiors in 1/12 Scale

Making Dolls' House Interiors by Carol and Nigel Lodder is one of my all-time favourite miniatures books. I have used it for inspiration for the decor and furnishings in several of my projects. It's a book I refer to over and over again. I always try for realism in my minis and that is why I appreciate the book so much - the room settings and furniture look so real. If you didn't know they were in 1:12 scale, you might think, from the beautiful photographs, that you were looking at real size scenes.
   Chapter One gives you all the information you need for starting out - tools, materials, safety, and basic methods. Then it moves straight into projects to create various rooms in different eras. The book has chapters on:


  • The Country Kitchen (Victorian era)
  • The Scullery (in a cottage and in a Victorian town house)
  • The Parlour (Victorian and Edwardian examples)
  • The Bedroom  (an attic room and a Victorian bedroom)
  • The Sitting Room (a 1950s room and a 1960s bedsit)
  • The Town Kitchen (a modern one and a Victorian one)
  • The Georgian Room ( as a bedroom and as a drawing room)
  • The Tudor Room (as a kitchen and as a parlour)
  • The Garden (a verandah and porch scene)
Each chapter gives instructions for the roombox dimensions and features, the decoration and lighting, the fixtures, the furniture and the accessories. The photographs are beautiful. 
   What I especially like is that all the patterns for making furniture etc are at the size you need - there's no faffing round trying to scale them up or down. Just photocopy them, cut them out and you're ready to start making minis.